Sunday, June 27, 2010

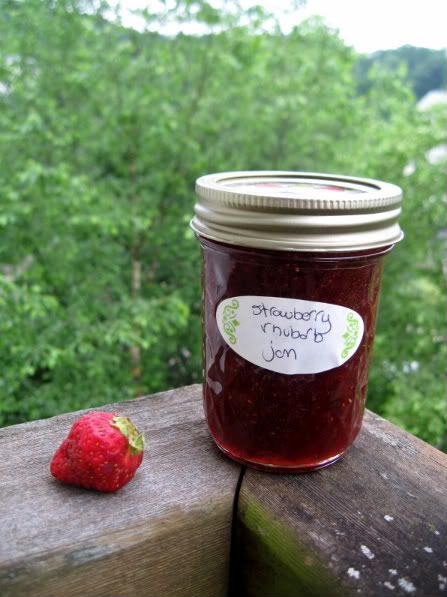
strawberry rhubarb jam and an apology...

Photobucket

first - the apology. i am sorry about my serious absence on my blog. the quality of the photos i have been trying to take for the website have been very disappointing. they all have this funky 1970's sepia tone quality because of the lack of light in my house. this has definitely put a damper on my blogging. but this will all be remedied soon...

because we are moving a month. to a real house with a killer kitchen. i can't wait. this place was owned by a chef and he re-did the whole kitchen. gas stove. marble counters. and windows! with actual light which is amazing for pictures. i'm so excited. better light = better pics for my blog...

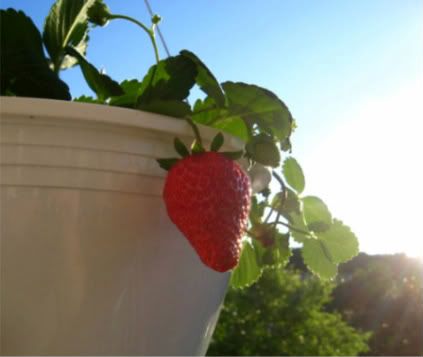
so in preparation for the big move - i have been trying to clean out my freezer. i have a couple of canning projects dwindling in there. a big quart sized container filed with apple/pear juice from the fall that didn't become jelly. and a huge bag of strawberries that never became jam...
Photobucket


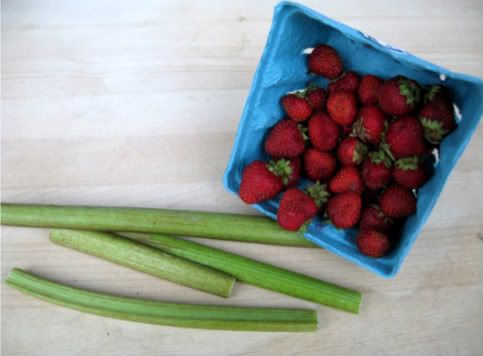
on top of that, i have about 15 stalks of rhubarb just languishing in my fridge from the csa through my job. that rhubarb has been sitting and staring at me for over a week. i started to feel a little guilty. so i broke out the canning pot...

i used liquid pectin for this jam. i had some floating around from last year so i decided to give it a try. this is my first time making jam with liquid pectin. it works very well. my jam is really jelled. almost a little to much for me. but i didn't follow any recipe exactly. i modified the one on the pectin box - so that's what ya get. the original recipe was right off the recipe packet in the pectin box...


strawberry rhubarb jam

3 cups crushed strawberries (about 1 1/2 quarts)
1 1/2 cups diced rhubarb
6 1/2 cups sugar
a couple of tablespoons of fresh lemon juice
Photobucket

start the boiling water/sterilizing process first. you want to at least have the jars in before you start the jam. keep your water boiling..

the original recipe called for 4 total cups of fruit (2 1/4 cups of strawberries and 1 3/4 cups of rhubarb). i had more strawberries then that so i tweaked it. hull and crush your strawberries 1 layer at a time. i ended with a little more then 3 cups of crushed strawberries and at least a cup of strawberry juice..

then i diced up about 5 smallish stalks of rhubarb. this should give you about a cup and a half. throw fruit into a heavy bottom pot and add the sugar. turn the heat on medium and let the jam come to a boil stirring frequently...

i let the jam cook for about 15 minutes to thicken it (because i added the extra juice). then i added the liquid pectin and continued to stir until the jam came to a boil again. let the jam boil for a full minute and then turn off the heat..

fill up you sterilized jars a 1/4 inch from the top of the rims. wipe the rim with damp cloth. place lids and rings on jar and twist until finger tight (not too tight). slowly lower the jars one by one into the boiling water.

let the jars boil for at least 7 minutes. remove the jar from the pot and set on a dish towel to cool. you should hear the lids pop as the jars cool.

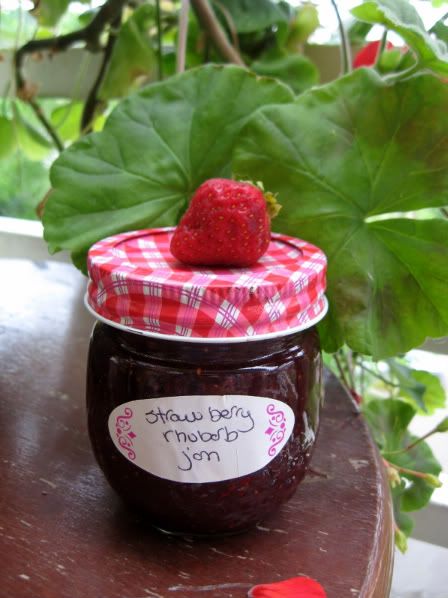
tada! you have canned for the first time and are a hard core pioneer woman. go enjoy that jam.
Photobucket

Wednesday, February 17, 2010

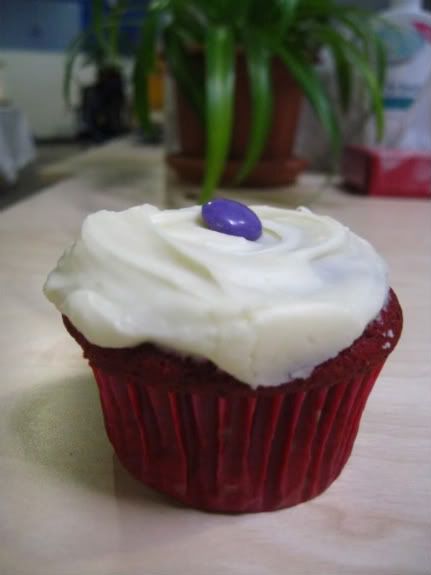
red velvet cupcakes...

Photobucket

so i made this new year's resolution to bake less and get back into the gym...

so here i am - up in the gym busting my ass on the elliptical machine on my lunch break. now most days i have my ipod but today i don't. so i turn on the tv attached to the machine and sure enough i end watching food tv while working out. ridiculous right. sweating and drooling at the same time. it is the most exquisite torture...

so i am watching sunny making her grandma's red velvet cake... now valentine's day is right around the corner. which is a perfect excuse to bake guilt free cupcakes. but they are for valentine's day i say. i am going to bring them into work. it is perfectly innocent...

fast forward to later that evening - me making cupcakes at 11pm...

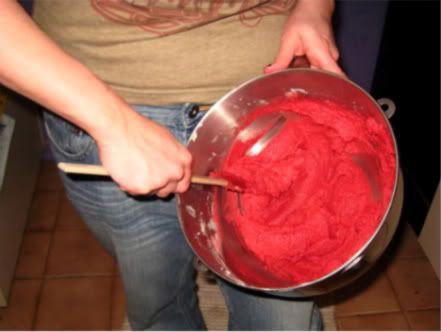
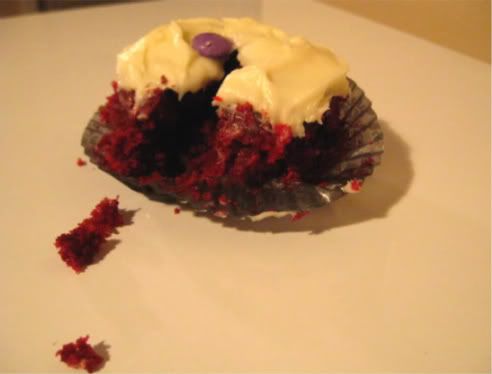
so the cake batter came together pretty easy. the frosting on the other hand - not so much. i really struggled with the traditional cooked frosting. it never got as light and fluffy as the recipe promised. the best i got was thick and opaque frosting-like substance. it tasted delicious on the cupcakes but it wasn't as pretty as i wanted. so i also made some cream cheese frosting to go on the other half of the cupcakes. i will give you both recipes...

Photobucket

here is the cupcake recipe and the original frosting recipe...

red velvet cake

2 sticks butter, room temperature
1 1/2 cups sugar
2 ounces red food coloring
3 tablespoons cocoa powder
pinch salt
2 eggs
1 cup buttermilk
1 teaspoon vinegar
1 teaspoon vanilla extract
2 1/2 cups all-purpose flour
1 1/2 teaspoons baking soda

5 tablespoons all-purpose flour
1 cup milk
1 cup sugar
2 sticks butter
1 teaspoon vanilla extract
1 1/2 cups chopped pecans (optional)

preheat oven to 350 degrees f.

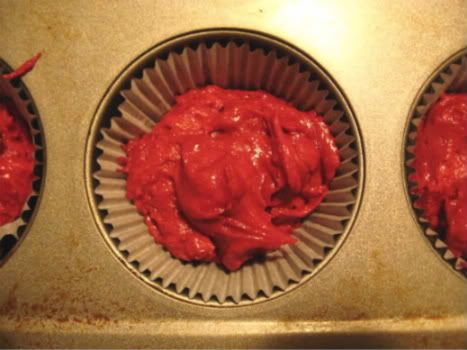
cream butter and sugar in a stand mixer fitted with the paddle attachment until light and fluffy. then make a paste out of the red food coloring, cocoa and salt in a small bowl. remove bowl from stand mixer and mix in paste by hand to the creamed butter. stir eggs with buttermilk in a measuring cup. place bowl back in mixer and add egg mix to batter. mix in vinegar and vanilla, and then add flour and baking soda. mix until combined but do not over mix...

grease two layer cake pans or put cupcake liners into two muffin tins. pour batter evenly into pans. bake cake until a toothpick comes out clean, about 30 minutes for layer cakes and 25 minutes for cupcakes.

to make the frosting: heat all ingredients in a medium saucepan. whisk until sauce thickens- about 15 minutes. let cool slightly before using.

Photobucket

so i definitely had some issue with the cooked frosting in this recipe. what i ended up doing was making basic cream cheese frosting for the other half of the cupcakes. here is my basic cream cheese frosting recipe...

cream cheese frosting

1 8-ounce package cream cheese, softened
1/2 cup (1 stick) unsalted butter
1 pound of powder sugar (sifted)
1 teaspoon vanilla extract
1 tbsp milk or half & half

mix the cream cheese and the butter in a mixer with the paddle attachment. add the vanilla. sift the powder sugar. put mixer on low speed and add the powder sugar cup by cup until incorporated. use milk about halfway through to keep the mixture from getting clumpy. i usually double the frosting if i am making a layer cake.

Photobucket

Sunday, January 31, 2010

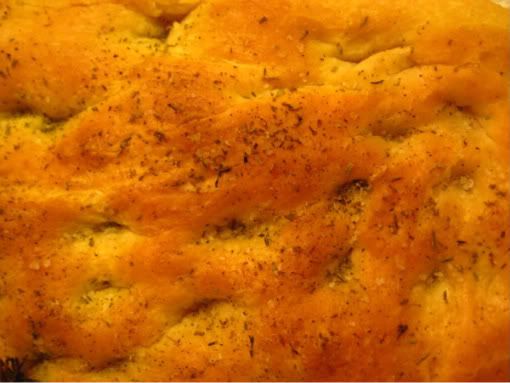
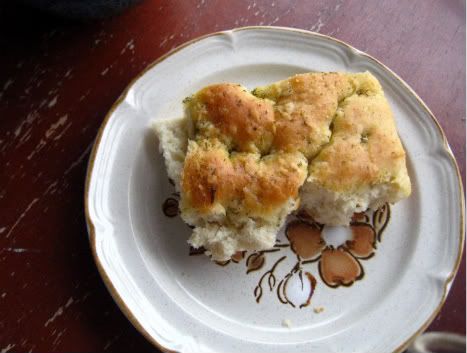
rosemary focaccia...

Photobucket


i love to bake bread on a sunday...

sundays are a lazy day for me. i sleep a little later then usual. then take the dogs for a nice walk. and i just have a nice slow day ahead of me to bake anything i want. i had made a big pot of wedding soup the night before - and you can't fully enjoy a bowl of soup without a slice of bread. so i planned to throw some bread together today...

bread is defiantly on the time consuming end of things but nothing is worth your time more then fresh baked bread. the smell it fills your house with beyond compare. it makes a house feel warm and homey. a fresh baked loaf of bread gives you such an old fashioned sense of accomplishment. you feel so proud just watching it cool on the counter...

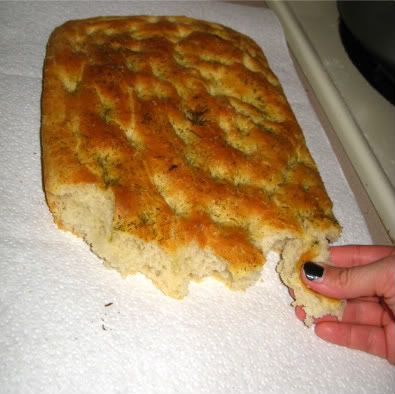
so yes, baking bread does take some time - but it is alot of hands off time. and don't be intimidated by the wordy-ness of the recipe. you just throw together the dough, knead it for a bit and then just to wait around for it to rise. focaccia is a very easy bread and it has such a nice texture - very chewy crust with a soft interior. the salt and herbs really add a nice flavor. try it this out on your next lazy sunday...

Photobucket


basic focaccia
about 3 hours for rising time
about 25 minutes of baking

sponge
1 teaspoon active dry yeast
1/2 cup warm water (105* to 115*F)
3/4 cup unbleached all purpose flour

dough
1 teaspoon active dry yeast
1 cup warm water (105*-115*F)
3 tablespoons extra virgin olive oil
3 1/4 cups unbleached all purpose flour
2 teaspoons kosher salt

topping
2 tablespoons extra virgin olive oil
1 1/4 teaspoons kosher salt
couple of fresh rosemary springs
dried rosemary, thyme and oregano

to make the sponge:
whisk the yeast into the warm water in a large mixing bowl and let it stand about 10 minutes until creamy. stir in the flour. cover tightly with plastic wrap and let rise about 45 minutes until very bubbly and has doubled.

to make the dough:
whisk second teaspoon if yeast into cup of warm and let it stand about 5 - 10 minutes until it is creamy. with a wooden spoon, stir the yeast mixture and olive oil into sponge and mix well.

if making the dough by hand:
add salt to flour. whisk in 1 cup of the flour at a time into mix until dough is well blended. knead on a lightly floured surface until soft and velvety, about 8 - 10 minutes.

if you are using a mixer:
add the sponge, dough mixture and olive oil into the mixer with the paddle attachment and blend on low. add the flour and salt and mix for about 2 minutes until everything is thoroughly mixed. change to the dough hook and knead at medium speed for 3 to 4 minutes until the dough is soft, velvety and sticky. finish by sprinkling 1 tablespoon of flour on your work surface and kneading the dough briefly until it comes together nicely.

first rise:
please the dough in lightly oiled bowl. cover this tightly with plastic wrap. let it rise 1 hour and 15 minutes until it is doubled.

shaping and second rise:
at this point the dough will be soft and full of air bubbles. flatten it into a well oiled 9 x 13 inch pan or on an oiled 11x 17 inch baking sheet. press it out with oiled hands. if the dough doesn't cover the bottom of your pan, let it rest for 10 minutes and then stretch it again until it reaches the edges. cover with a towel and let rise for 1 hour.

baking:
preheat the over to 425*F about 30 minutes before you plan to bake.

dimple the dough with your fingertips leaving little indentations. drizzle olive oil over the dough. sprinkle with coarse salt. tuck little tufts of rosemary into the little indents all over the bread. you can also crush up some dried rosemary, thyme and a little oregano in a mortar & pestle and sprinkle over the top of the bread for a really nice herby taste.

place focaccia on the middle rack in the oven. spray the oven walls and floor with cold water from a spritzer bottle 3 times during the first 10 minutes of baking. bake until the crust is crisp and top is golden - about 20 - 25 minutes.

remove from the pan immediately and cool on a rack. see how long you last waiting for this too cool. we didn't last too long...

Photobucket

Sunday, November 15, 2009

oatmeal cream pies...

Photobucket


so i am way overdue for a post. but i am back with something special...

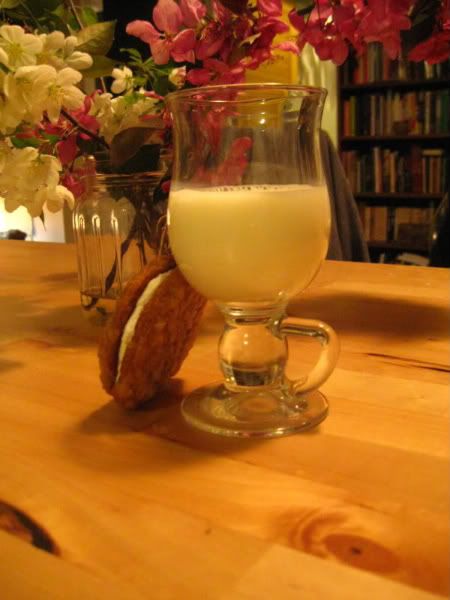
i found these cookies when i was trolling blogs one night when i was hungry for dinner but to lazy to make it. i really loved how retro these cookies looked. the idea of cute 1970's children with little debbie snacks in their metal lunchboxes. the looked so gooey and tasty. i had to have them...

more importantly then how they look - the recipe for the filling has fluff in it. oh yes. marshmallow fluff. gooey delicious-ness in a plastic tub. a substance that must be kept out of my house unless it has a specific purpose. hehe...

so this my friends is not a cookie for the fainthearted. but the results are well worth it...

i think next time i would double the batch. there is definitely some work involved in making these. the cookies are nice and chewy and the middle is soft and sweet...

make a batch and then bring them to work the next day to get them out of your house. then burn the recipe.

=o)

oatmeal cream pies
adapted from recipe zaar

ingredients

1 cup butter
3/4 cup dark brown sugar
1/2 cup sugar
1 tbsp molasses
1 tsp vanilla
2 eggs
1 3/4 cups flour
1/2 tsp salt
1 tsp baking soda
1/8 tsp cinnamon
1/2 cups rolled oats


cream filling

2 tsp very hot water
1/8 tsp salt
1 (7 ounce) jar marshmallow cream
1/2 cup shortening (i told you this recipe was old school)
1/3 cup powdered sugar
1 tsp vanilla


combine flour, salt, baking soda, and cinnamon in a bowl. cream butter and sugars in a large bowl. beat eggs in one at a time. finally beat in molasses and vanilla.

add to the flour mixture to creamed mixture and beat until just blended then mix in the oats with a wooden spoon.

drop dough by tablespoons (seriously - don’t go bigger than this - they spread out)on parchment lined sheets with plenty of space between. i fit two on a regular sized baking sheet. bake at 350 degrees for 10-12 minutes. cookies will look moist or until just starting to brown around the edges - don’t overcook. (10 minutes was perfect for me). let sit on cookie sheet for about 5 minutes and then transfer to wire racks to cool completely...

while the cookies bake prepare the filling... dissolve the salt in the hot water in a small bowl. set aside and allow this to cool...

combine marshmallow cream, shortening, powdered sugar, and vanilla in a bowl and mix on high until fluffy. the filling never really rises like an egg-white based frosting but you can tell it’s fluffier after 3-4 minutes...

add the cooled salt water and mix well...

spread filling on flat side of one cookie then press 2nd cookie on top...

makes 1 1/2 – 2 dozen

Friday, June 5, 2009

so i'm a slacker...

i have been so busy with setting up my multiple gardens that i really haven't had a chance to update... i know... excuses excuses... but i plan to do some serious blogging this weekend... including garden pics... molasses cookies... homemade oatmeal cream pies... and homemade oreos... cuz i love making cookies... and eating cookies... hahaa...

kate
=o)

Monday, May 4, 2009

plant update - strawberries...

Photobucket


we planted some strawberries into hanging baskets on our balcony. we planted 3 strawberries in each pot and filled two pots. we hung the baskets on the porch where they will get a lot of sun.

Photobucket


here are the tomatoes on week 5. they are getting big. i'm so excited. i grew my own tomatoes from seeds. and i have started hardening them off - which means you start putting your plants out for a couple hours a day to get them used to outside weather conditions until you transplant them in your garden. you eventually build up to leaving them outside full time - then you throw them in the garden.

Photobucket


soon our community plot is going to open and i can starting digging in the dirt - woohooo...

Saturday, May 2, 2009

apple crumb coffee cake...

Photobucket


so i am sure by now it is well known that i have a baking problem... cookie issues... a pie addiction... and an ever growing waistline from eating all of the goodies i bake... so in an attempt to make something tasty but not super bad for me.

so i tried this very yummy looking coffee cake from one of my favorite blogs - everybody loves sandwiches...

Photobucket


so this cake is not without sugar or butter. but it has alot less then most crumb cake. especially a lot less butter but the oil really give the cake a nice texture. you could try other fruit in there like strawberries or peaches or blueberries. yum.

i had to work this saturday and it was so fucking tasty for breakfast with a big cup of coffee. you know since it was so healthy - i felt throwing a drizzle of icing on it was acceptable...

Photobucket


apple crumb coffee cake...

1 1/2 cup flour
2 1/4 tsp baking powder
1/2 cup brown sugar
1/2 tsp salt
1/2 tsp cinnamon
1/4 tsp cardamom
1 egg
1/2 cup milk
1/2 cup canola oil
1 granny smith apple, chopped

crumb topping:
1/2 cup brown sugar
1/4 cup flour
1/4 cup rolled oats
3 tbsp butter
1/2 tsp cinnamon
1/4 cup walnuts

Photobucket


preheat oven to 400. butter and flour an 8" round cake pan - shaking off any excess flour. make crumb topping in a medium-sized bowl. using your fingers mix in butter until you have pea size crumbs. set aside...

in a large bowl mix together dry ingredients. in a smaller bowl combine egg, milk and oil. add the wet to the dry and mix. add in apples and stir until combined. pour batter into prepared pan and top with crumb mixture. bake for 25-30 minutes or until a knife inserted in the center comes out clean. let cool.

prepare a pot of your favorite coffee and go to town...

Photobucket